Tag Archives: chocolate cake

Devil’s Food Cake

Standard

Chocolate cake. There are endless recipes, and endless varieties, all taste brilliant… After all, its chocolate, what’s not to love!

This recipe is adapted from Nigella Lawson, I made very minor changes depending on what I had or didn’t have. The result is still brilliant, quite spongy, quite moist. One of the changes I made in the frosting was that I didn’t use dark chocolate as I didn’t want it to be too bitter.

Another point to note is that the frosting will seem to be too runny to be used as a frosting. It will be runny for a long long time if you leave it at room temperature to firm up. So I put it in the freezer 🙂 15 minutes, and it was where I wanted it. Not runny at all, but not brick hard as well. Smooth to touch, but I was able to frost the cake quite smoothly with it as you can see.

upload3


Makes an 8″ cake.

Ingredients:

For the cake:

Cocoa powder – 50 grams
Dark brown sugar – 100 grams 
Boiling water – 250 ml 
Soft butter – 125 grams
Caster sugar – 150 grams 
Plain flour – 225 grams
Baking powder – ½ teaspoon 
Baking soda – ½ teaspoon
Vanilla extract – 2 teaspoons 
3 medium eggs

For the frosting:

Water – 125 ml
Dark brown sugar – 30 grams
Butter – 175 grams
Dark chocolate or Milk Chocolate (I used milk chocolate), broken into equal pieces – 300 grams

Method:

  1. Preheat oven to 180 degrees C. Prepare an 8″ pan or two 8″ sandwich pans.
  2. Mix together the dark brown sugar, cocoa powder and boiling water. Briskly stir to mix and set aside.
  3. Sift together the flour, baking powder and baking soda and set aside.
  4. Cream the caster sugar and butter until light and fluffy. Add the vanilla essence, and the eggs, one at a time. Keep whisking. Then add the sifted flour. The finally fold in the dark brown sugar mixture.
  5. The batter will be extremely runny. Pour in well greased pan and bake at 180 degrees for 30 minutes or until a skewer inserted into the centre of the cake comes out clean.
  6. While the cake is baking, make the frosting. Put the water, sugar and butter in a pan and bring to boil. Remove from heat and add the broken chocolate. Swirl the pan so that the chocolate is fully covered by the liquid. Leave for a while to allow the chocolate to melt.
  7. Then whisk with a spoon, mixing properly. You can either leave at room temperature to thicken if you have time or put in fridge/freezer to set quickly.

I sliced my cooled cake horizontally and put frosting in the centre and on the sides. I decorated with chocolate shards and piped some roses with ganache. You can just frost it and serve it as such, it tastes amazing just like that!

IMG-20140612-WA0004


Black Forest Cake

Standard

Whenever I hear the name “Black Forest Cake” I am transported back into my childhood days. This is a cake that me and my sister used to make in our college days. I remember we used coke in the cake, can’t remember why but I do remember it was a good recipe :).

I have been trying to recreate that magic since some time, and finally got a chance. Although this recipe doesn’t use coke, but makes an amazing cake! In looks, as well as in taste. I made this for my sister in law’s anniversary, and everyone was left licking their fingers and asking for more.

I tried using tempered chocolate to create curls and chocolate decorations for the first time ever, and I must say, for the first attempt, I was pretty pleased with it. More than that, actually..trying to be modest here. I am not including the method of tempering chocolate and creating chocolate decorations, as I followed videos from you tube and you can do that as well. There are so many videos and information, there’s a whole world out there!

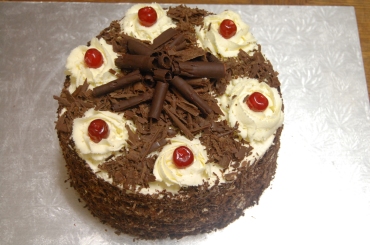
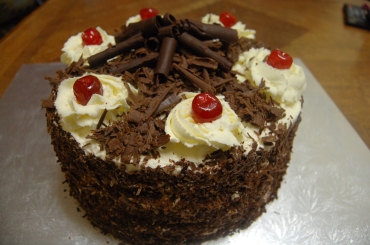
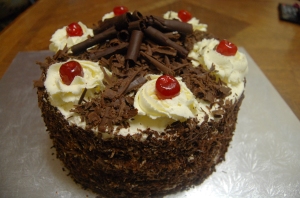
This is how the cake turned out. Loved it!

DSC_9554

I followed my Chocolate cake recipe to make the initial sponge. The only change I made was that I didn’t bake the whole sponge together as mentioned in the recipe. I used two 8 inch cake pans to split the batter into 2 sponges and then baked them in the oven at the same time. I made two such batches, and used three of these sponges. The fourth one we ate while icing the cake, testing for taste, you see 🙂 One advantage I see of splitting the batter into two cake pans is that the sponges come out softer and bake much faster. So this way, each batch was baked in about 20 minutes and was wayyyyy softer than what it would have been otherwise. Also, it saves the task of slicing the cake to put icing between the layers, as I can never manage to make the two parts level.. hard indeed!

DSC_9558

So as I mentioned above, once you have all 3 sponges ready, you can follow these steps for icing. You can also use just 2 sponges, but I wanted the cake to be bigger. This cake served around 15 people, but the slices we cut were massive, so it could have easily served 20.

Ingredients:

Double Cream – 750 gm

Cream cheese (Mascarpone cheese) – 1/2 pack (of a 250 gm pack)

Icing sugar – 1/2 cup

Dark Chocolate – 100 gm

Cherries in syrup – 250 gms (you can increase/decrease the amount as you like)

Sugar syrup made with 1/2 cup sugar and 1/2 cup water boiled together and cooled.

Chocolate curls to decorate

Method:

  1. Reserve 7-8 whole cherries, and quarter rest of them. Keep aside.
  2. Grate the dark chocolate or another option is to create bigger chunks using a potato peeler. The best one to use is a Y Peeler.
  3. Whisk the cream with the icing sugar in a chilled food processor until stiff peaks form. 
  4. In a separate bowl, whisk and soften the cream cheese. Gently fold in the whipped cream and refrigerate till required.
  5. Take each sponge and brush the top with sugar syrup with a pastry brush. Make sure you don’t over soak the sponges else they will be too soft.
  6. Then spread the first sponge with some of the whipped cream, creating a nice smooth level layer. Top with half of the quartered cherries.
  7. Place the second sponge on top, and repeat step 5.
  8. Then finally place the third sponge on top. Spread the remaining whipped cream on the top and sides, reserving a little for creating the swirls on top to place the cherries.
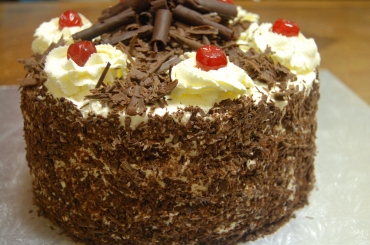
  9. Use a palette knife or just your hands to press the grated chocolate all over the cream on the sides of the cake, just like in this picture. You will get more used to this as you work on it. You can just go on picking up the chocolate that falls, and reuse the same. Reserve some for the top.DSC_9565
  10. Create swirls using the remaining cream on top of the cake, I made 6 swirls on mine. Try to make them as equally spaced as possible. Place one whole cherry in each swirl.
  11. Cover the top of the cake and between the swirls with the remaining grated chocolate.
  12. Finally top it all with the chocolate curls!

Yummilicious Black Forest cake is ready!

Chocolate Cake (Eggless)

Standard

This is a simple recipe of a chocolate cake that works wonders. Unfortunately, the only pic I have of this is in the Black Forest cake I made, but which is a wonderful picture and cake I think, and this picture will give you a fairly good idea of how this cake turned out.

DSC_9558

Makes an 8 inch cake

Ingredients:

Plain Flour – 2 1/2 cups

Baking powder – 2 teaspoons

Baking Soda – 1 teaspoon

Sugar – 1 cup

Fresh Orange Juice – 1 cup

Butter (Softened, at room temperature, not melted) – 1 1/3 cups

Whole milk – 1 1/3 cups

Vanilla essence – 2 teaspoons

Boiling water – 6-7 tablespoons

Cocoa powder – 5 tablespoons

Method:

  1. Preheat oven at 180 degrees and bake at the same temperature.
  2. Sieve together the flour, baking powder and baking soda 3-4 times and add sugar. Keep aside
  3. In a separate bowl, mix together all the wet ingredients except milk and boiling water.
  4. Make a well in the centre of the dry ingredients and pour in the wet ingredients mixture. Mix well by hand. Remember its key not to over mix . Even if there are a couple of lumps of flour, its OK  just ensure the whole mixture isn’t lumpy.
  5. Mix together the boiling water and cocoa powder to form a smooth paste. Add milk to it to make a nice rich smooth texture. Add this to the above mixture, and incorporate well. Again, don’t over beat.
  6. Put the batter in a greased and floured 8 inch pan.
  7. Bake in the preheated oven at 180 degrees for about 40 mins or till a skewer inserted in the centre of the cake comes out clean.
  8. Let the cake cool for 10 mins in the pan before removing it, and let it cool completely before icing it.

Cake Fudge

Standard

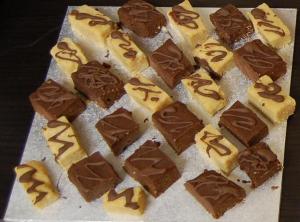
Okay, so this one is dedicated to my sister in law. We invented this scrumptious sweet when we were working on brownie lollipops for my niece’s birthday. See the link here for brownie lollipops on my blog.

After making enough lollipops for the kids, we had lots of leftover cake which we wanted to put to good use. Well, we could have ended up gorging on it any ways, but then thought why not share the fun! So we turned them into “Cake Fudge”, a barfi like sweet made of cake.

It became an instant hit with all the biggies, and even later I was complimented on how tasty this sweet was. So many people asked me what it was made of, no one can actually make out that its made of cake. It is a fabulous “sweet” snack to be made for parties, it is sure to be whipped away!

Makes about 20-25 pieces

Ingredients :

  1. Any sort of cake – plain or chocolate. You can use your own recipe or you can refer to these links on my blog for eggless cake recipes.  Plain egg less cake:  http://wp.me/p2oNVt-A  .  Eggless orange cake  – http://wp.me/p2oNVt-10  You will need about 2 cups of crumbled cake.
  2. Mascarpone cheese/Cream cheese – 2-3 tablespoons
  3. Milk Chocolate (melted in a double boiler) – 1 1/2 cup
  4. Chocolate sauce to drizzle.

Method :

  1. Put the crushed cake in a big bowl and add some of the melted chocolate (start with a spoonful) and some of the mascarpone cheese to it, little by little, until you get a consistency which would easily bind in little balls.
  2. Once you get the desired consistency, spread the mixture on a plate or tray. It should be at least an inch high when you spread it and try to smooth the sides so that the mixture forms a nice neat big square.
  3. Let the mixture set for some time. You can put it in the fridge for some time to set.
  4. Once the mixture is set and firm, cut it into desired sized squares, or even diamonds.
  5. Drizzle chocolate sauce over each piece to decorate.

Tips:

  1. For the chocolate sauce, you can either use ready made bottled sauce or even use the melted milk chocolate that will be used to put in the crumbled cake.
  2. In the picture here, I have made two types of cake fudge, chocolate and vanilla. For the chocolate fudge, I used milk chocolate to bind, for the vanilla fudge, I used white chocolate to bind it.